Note
:
SoCast does not provide DNS Support unless you've purchased our DNS Concierge Services.
In the event you require assistance with making your DNS changes to launch your SoCast website, please contact your DNS Panel Administrator or your Domain's Registrar directly for support.
1. About the DNS Records
- Website record set: A list of CNAME and A records for pointing your website domain to the Socast platform. This record set should always be added last and should only be done when you are ready to officially launch your Socast website. You will also need to make sure that the proper domain names have been added to your Website Settings before configuring these records to prevent any service interruption.
2. Website Records
At this point, you should already have the verification records for e-mail in place as proceeding any further will launch your Socast hosted website. If you are already using your domain to host your website on another provider, be advised that this will cause all traffic to stop reaching your old hosted content and will begin reaching your new Socast hosted content.
Launching the Site
This part of the configuration process should be done carefully, as any improper configuration could result in outages or availability issues. From our example CSV file below (or your own CSV file if you are following along), you will need to make note of the following information:
-
Record Name (Column A):
Highlighted in yellow, this is normally referred to as the "Name" or "Host". Most DNS providers will automatically append your domain's name to the end of whatever is entered in this column, so including it in the DNS entry isn't necessarily required. When properly configured, any requests to this hostname (ie.
o
urtestdomain.com) should respond with the corresponding record value from column C (ie. 54.84.131.112 or ourtestdomain.com).
-
Record Type (Column B):
Highlighted in green, this is the type of record that should be created. In this case, we need to create A and CNAME records since the Value (column C) contains either an IP address or a fully qualified hostname (ie. 54.84.131.112 or ourtestdomain.com respectively).
-
Record Value (Column C):
Highlighted in blue, this is normally referred to as the "Value". Some providers may provide text similar to "Points to..." which essentially represents the same thing. This should reflect the value of column C (ie. 54.84.131.112 or ourtestdomain.com).
Preparing the Platform
You will similarly need to create DNS records as you did for e-mail, however you will first need to configure the platform to respond to the host names you want to use. In this example we will set our site up to respond to three (3) different host names (substitute your own values if you are following along):
-
ourtestdomain.com:
This will be the primary host name that the site should be reachable on.
-
www.ourtestdomain.com:
This will be a secondary (alias) address that the site should be reachable on. This always forwards to the primary host name (ie. ourtestdomain.com)
-
news.ourtestdomain.com:
This will be another secondary (alias) address that the site should be reachable on. This always forwards to the primary host name (ie. ourtestdomain.com)
You'll note that by default Socast only provides DNS examples for the root domain (ie. ourtestdomain.com) and the "www" prefix (ie.
www.ourtestdomain.com).
These are just suggested host names as you are free to modify, add or remove host names as required. In our example we will create the two suggested hostnames (ourtestdomain.com and
www.ourtestdomain.com)
but also follow similar instructions to create an additional domain (news.ourtestdomain.com).
To configure the platform to use these names:
-
Login to the Socast backend with an account that has permission to modify
Website Settings
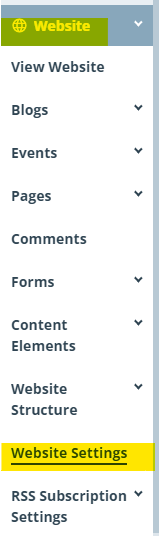
- In the upper-right navigation strip, click the Settings option
- Select Website Settings from the available options
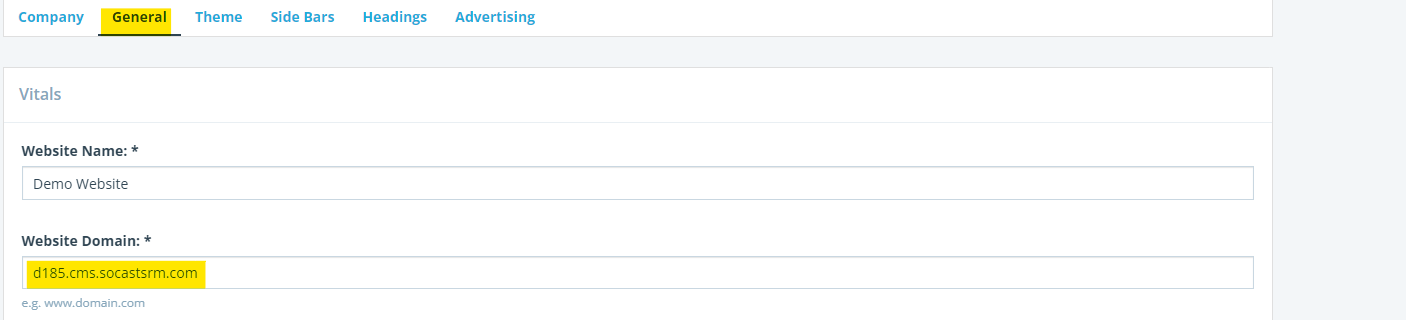
Under General > Vitals section begin by setting your Website Domain . This should reflect the primary host name (ie. ourtestdomain.com from above)
- Under the Website Redirect portion, click the Add Row button to add another secondary host name that should point to your Socast hosted content (ie. www.ourtestdomain.com from above).
-
Click
Save

Implementing Website Records
-
Login to your DNS provider's configuration panel
-
First you will need to create an A record for your primary domain to point to the Socast platform. Since the primary domain in this example is ourtestdomain.com this will be the first record to createNote that we use an " @ " symbol in the "Host" or "Name" field to represent to domain name (ie. ourtestdomain.com). This is standard DNS syntax, although alternatively you could specify the entire domain name and append it with a dot " . " instead (ie. outestdomain.com . )
- Next you will need to create a CNAME record for the desired secondary domains that point back to the primary domain record configured earlier (ie. "Name" or "Host" would be www.ourtestdomain.com and "Value" or "Points to..." would be ourtestdomain.com)
You should also be sure to set the TTL value for these records to a value under 1 hour to allow these changes to propagate around the internet quickly.
Securing your Site
The Socast platform offers a number of security related features that are automatically implemented once a site has been successfully launched. These features and countermeasures ensure a safe, secure browsing experience which clients engage with any Socast hosted content.
4. Web Application Firewall
The Socast platform is secured by a web application firewall that has been designed to respond and defend against many common types of attacks on the internet such as (but not limited to):
-
Denial of service
-
XSS (Cross Site Scripting)
-
Malicious bots
-
Injection attacks
Because Socast has taken these measures, it is requested that any customers who are using a third-party vendor for this type of security opt to disable these features as they can cause false positives and impact your website's availability. A good example of this would be Cloudflare's website proxy. If your website's DNS is hosted or routed through a service like Cloudflare to protect against things like denial of service, you will need to be certain that this traffic is not in any way routed or modified by Cloudflare as it will trigger Socast's own application firewall and prevent access to your website(s).
5. SSL Certificates
All Socast platform customers are provided with an ongoing, free SSL certificate to secure their websites with. This is done automatically and supports the adding and removing of additional website aliases (providing they are properly configured in your DNS settings). Upon either launching a new site or modifying an existing site's host names in the backend and all the required DNS records are in place, an SSL certificate will be automatically generated (or modified if already existing) to include the names configured in your
Website Settings
. Normally these changes can be seen within an hour, approximately - however if it has been longer than 12 hours and your site still isn't secured with an SSL certificate, please reach out to Client Services for further investigation. The certificate can only ever contain names that resolve via DNS to the Socast platform. So if there are any host names configured in the backend that have either been removed from your DNS configuration or are otherwise absent, these names will not be included in your SSL certificate.